
Hiking Backpack with Diagram hacks & tips
Packing a hiking backpack may seem like a daunting task, but with the right techniques and a clear understanding of how to organize your gear, you can make your outdoor adventures much more enjoyable. In this guide, we’ll cover every detail of how to pack a hiking backpack with a diagram, providing practical tips and a comprehensive checklist to ensure you’re prepared for the trail.
How to Fit a Hiking Backpack tips?
A properly fitted backpack is essential for comfort and avoiding strain on your body. Follow these steps:
- Measure your torso length: Measure from the base of your neck (C7 vertebra) to the top of your hip bones. Choose a backpack that matches your torso size.
- Adjust the hip belt: Place the padded sections on top of your hip bones. Tighten until it feels snug but comfortable. This area should bear 60–80% of the pack’s weight.
- Set the shoulder straps: Adjust them so the pack hugs your back without gaps. The straps should curve naturally around your shoulders.
- Fine-tune the load lifters: These are the small straps near your shoulders. Pull them to tilt the pack closer to your upper back.
- Position the sternum strap: Fasten this strap across your chest, ensuring it’s not too tight but helps stabilize the load.
Match Your Gear to Your Trip
Packing begins with selecting the right gear as your Hiking Budget. Tailor your items to the length of your trip, weather conditions, and specific needs.
For Day Hikes
- Lightweight essentials like water bottles, snacks, sunscreen, and a first-aid kit.
- A small daypack with hydration compatibility.
For Overnight or Multi-Day Hikes
- Tent or hammock setup: Choose based on weather and terrain.
- Extra clothing layers: Include insulation and waterproof options.
- More food and water: Calculate based on daily calorie needs and availability of water sources.
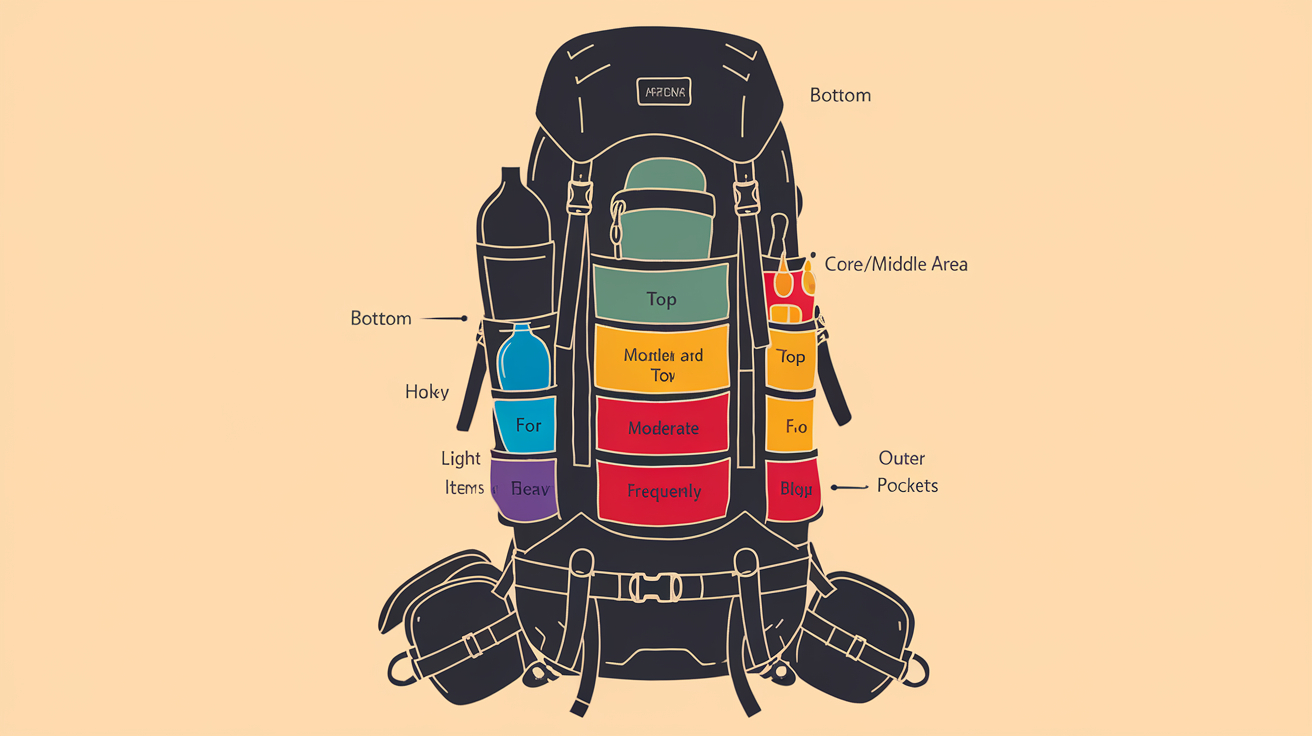
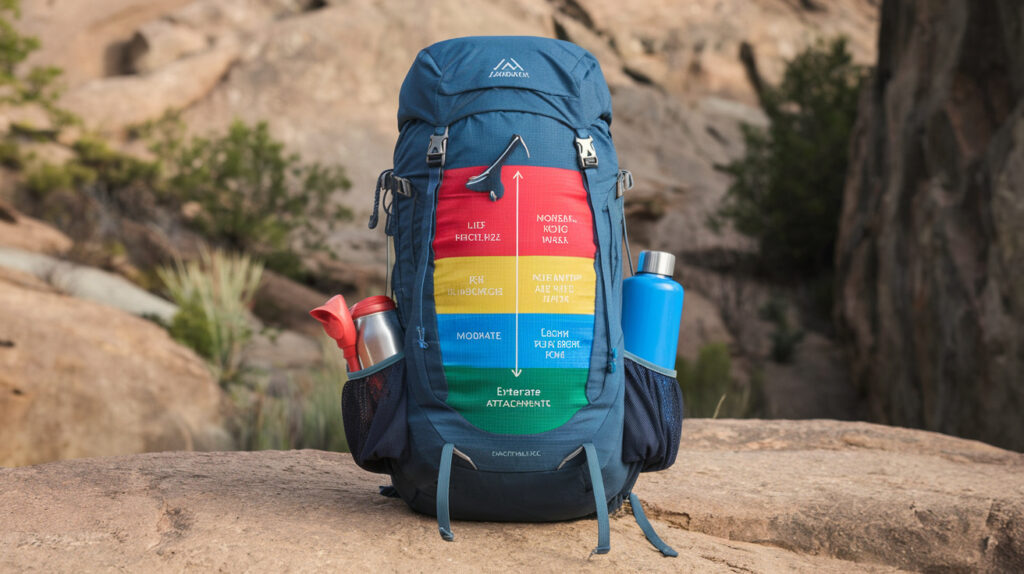
How Do You Arrange Things in a Hiking Bag? Camping gear how to pack a hiking backpack diagram
The key to packing a hiking backpack is strategic organization. Divide the pack into three main zones:
Bottom Zone: Sleeping Bag & Lightweight Gear
- Purpose: Reserve this space for bulky, lightweight items you won’t need during the day.
- Examples: Sleeping bag, sleeping pad, and extra layers.
- Packing Tip: Use a compression sack to minimize volume.
Middle Zone: Heavy Items (Tent, Cookware, Food)
- Purpose: This area should hold the heaviest items to maintain a stable center of gravity.
- Examples: Tent, cookware, stove, and food.
- Packing Tip: Pack heavy items close to your back for balance.
Top Zone: Clothes & Essentials
- Purpose: Store frequently used items here for easy access.
- Examples: Rain jacket, snacks, toiletries, and maps.
- Packing Tip: Roll clothes to save space and keep them organized.
Side Pockets:
- Perfect for water bottles, tent poles, or trekking poles.
Front Pocket:
- Store flat items like a map, permits, or guidebooks.
Pack That Bag (Or, How to Make It All Fit!)
Fitting everything into your hiking backpack efficiently requires careful planning:
- Use packing cubes: Separate clothes, toiletries, and food to keep your gear organized.
- Compression sacks: Compress bulky items like sleeping bags.
- Fill gaps: Stuff socks, gloves, or smaller items into spaces between larger gear.
- Distribute weight evenly: Keep the pack balanced by evenly distributing heavy items on both sides.
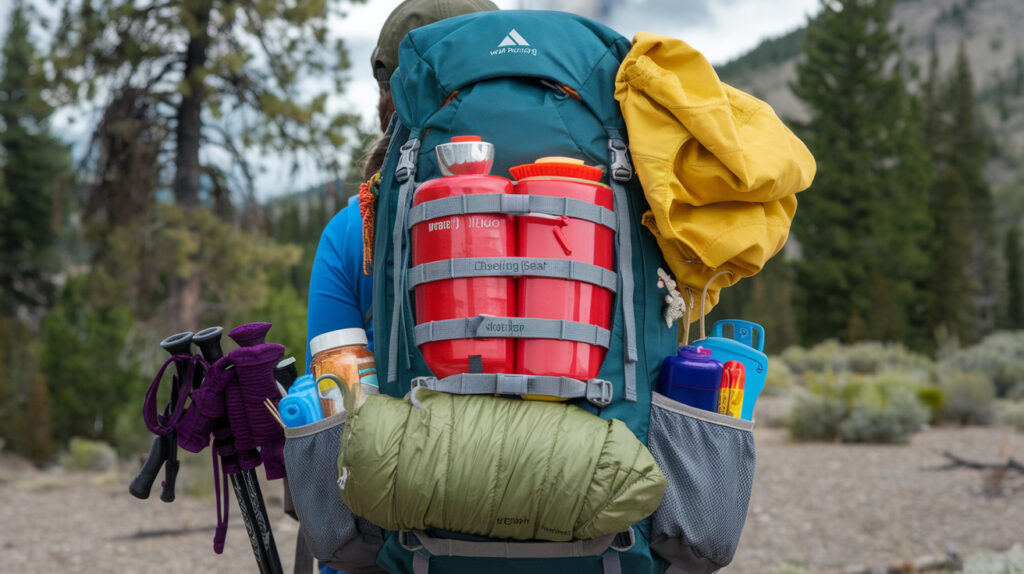
Packing Systems, Tricky Items & Other Tips
Bear Canisters
- Required in some areas to store food safely from wildlife.
- Pack the canister in the middle zone for stability.
Fuel Canisters
- Keep upright to prevent leakage.
- Store in a secure side pocket or with cooking gear.
Tent Poles & Stakes
- Slide these into the side pockets or strap them securely outside the pack.
Waterproofing Your Pack
Rain can strike unexpectedly, so protecting your gear is crucial:
- Rain cover: Ensure your backpack has a fitted rain cover. If not, purchase one separately.
- Dry bags: Store clothes, sleeping bags, and electronics in waterproof dry bags.
- Plastic liners: Use heavy-duty garbage bags as an affordable alternative for internal waterproofing.
How to Pick Up a Heavy Pack
Lifting your packed backpack the wrong way can strain your back. Here’s the correct method:

- Place the pack upright on the ground.
- Bend your knees to squat down beside it.
- Grab the pack by its haul loop (the top handle) and slide it onto your thigh.
- Swing the pack onto your back using your legs for power.
- Adjust the straps for comfort and stability.
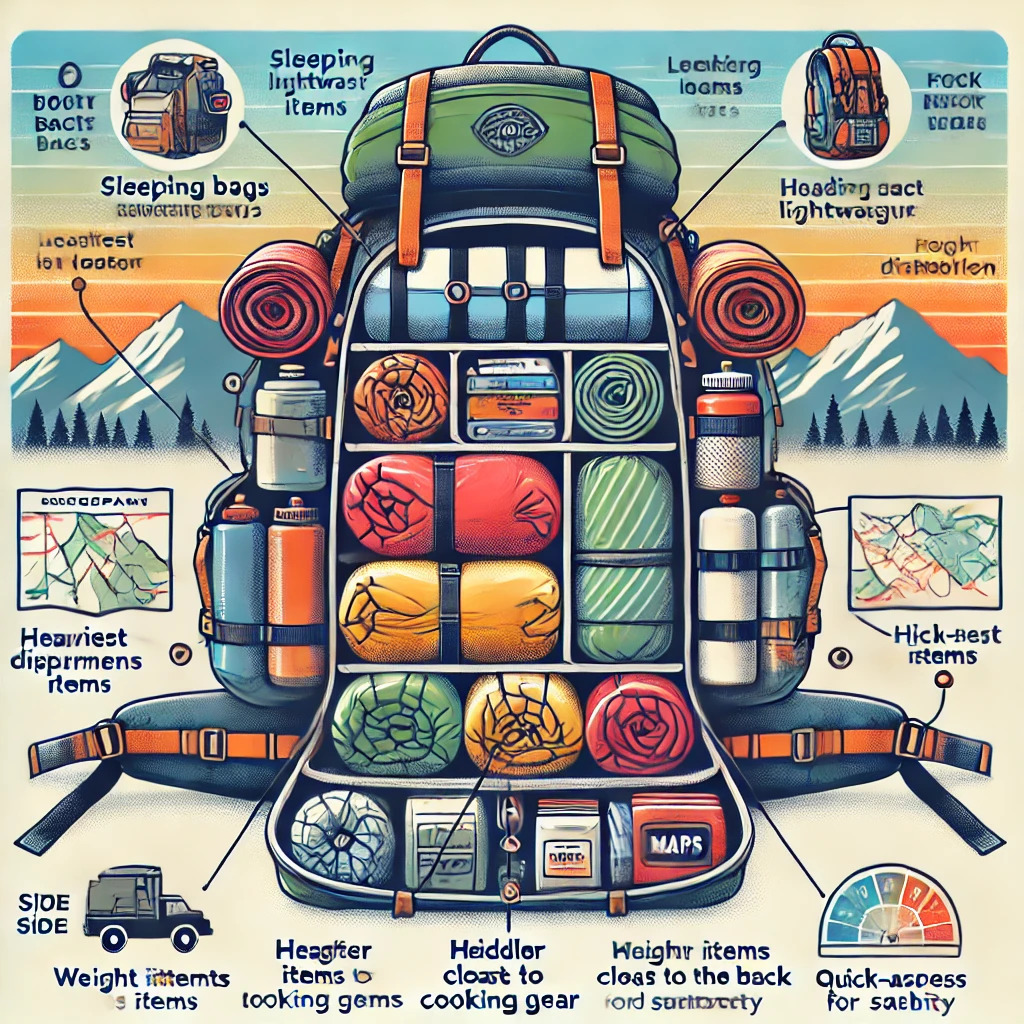
Backpacking Gear Packing Checklist with Diagram
Sleeping Essentials Gear Packing
- Backpack
- Rain cover
- Tent
- Sleeping bag
- Pillow or stuff sack
- Sleeping pad or air mattress
Toiletries
- Toothbrush and toothpaste
- Sunscreen
- Bug wipes or spray
- Biodegradable soap
- Toilet paper
- Hand sanitizer
- Menstrual products
- Trowel for burying waste
Cooking & Hydration
- Camping stove and fuel
- Cookware and pot grips
- Lighter or waterproof matches
- Dishes and utensils
- Water bottles or hydration reservoir
- Water filter or treatment tablets
Clothing
- Wool socks and hiking boots
- Shorts and t-shirts
- Insulated jacket and rain gear
- Sunglasses and a hat
Safety & Navigation
- Map, compass, or GPS
- Emergency beacon or whistle
- Headlamp and extra batteries
- First aid kit
- Knife or multitool
Personal Items
- Permits
- Cash, ID, and credit cards
- Cell phone and power bank
How to Pack a Backpack Cheat Sheet
For quick reference:
- Bottom Zone: Sleeping bag, sleeping pad, and other lightweight gear.
- Middle Zone: Tent, cookware, stove, food, and other heavy items.
- Top Zone: Clothes, rain gear, and small essentials.
- Side Pockets: Water bottles, tent poles, or trekking poles.
- External Loops: Use these to attach bulky items like sleeping mats or ice axes.
Tips for Success Hiking Backpack
- Do a trial run: Pack your backpack and go for a short walk to test comfort and fit.
- Leave no trace: Follow the principles of Leave No Trace to protect the environment.
- Emergency preparation: Leave your itinerary with a trusted contact before heading out.
For more, you can also check out Reddit How to Pack a Hiking Backpack diagram
Conclusion for How to Pack a Hiking Backpack with Diagram
Packing a hiking backpack is more than just stuffing gear it’s about organizing efficiently, distributing weight evenly, and waterproofing essentials. By mastering how to pack a hiking backpack with a diagram, you’ll enjoy a more comfortable and safer hiking experience. Use this guide to prepare for your next adventure and make the most of your time in the great outdoors.
If this Blog Post Helps you share with your friends follow us for more hiking Guide and Tips also on social media to get updates Thank you for visiting – myhikingguide.com
FAQs About Backpack
Hiking With a Cold?
If you’re questioning whether it’s safe to go hiking with a cold, the answer is yes under certain conditions. Hiking can be invigorating, but being mindful of your health is essential.
How Long Does It Take to Hike 3 Miles?
average person would take approximately 1.5 to 2 hours to hike 3 miles.